Proportionally scale product images to prepare for automation

Goal: Standardize product image sizes so they are always proportionally consistent

Before preforming any automation tasks using your product assets, they must be prepared for it. Here we are primarily making sure the product images are all proportionately sized. This way, when we make visuals, we ensure that:

  1. Proportions stay consistent no matter what visual is being created.

  2. Do not accidentally make a tiny sample sized bottles bigger than the main product.

  3. Non-designers are not guessing and randomly re-sizing products.


Step 1: Get a rough idea of physical proportions

The easiest and perhaps the fastest way to size products to scale is by simply arranging physical products in a row on a table and taking a photo with your phone. It should look something like this:

ProductLineUpPhoto-1

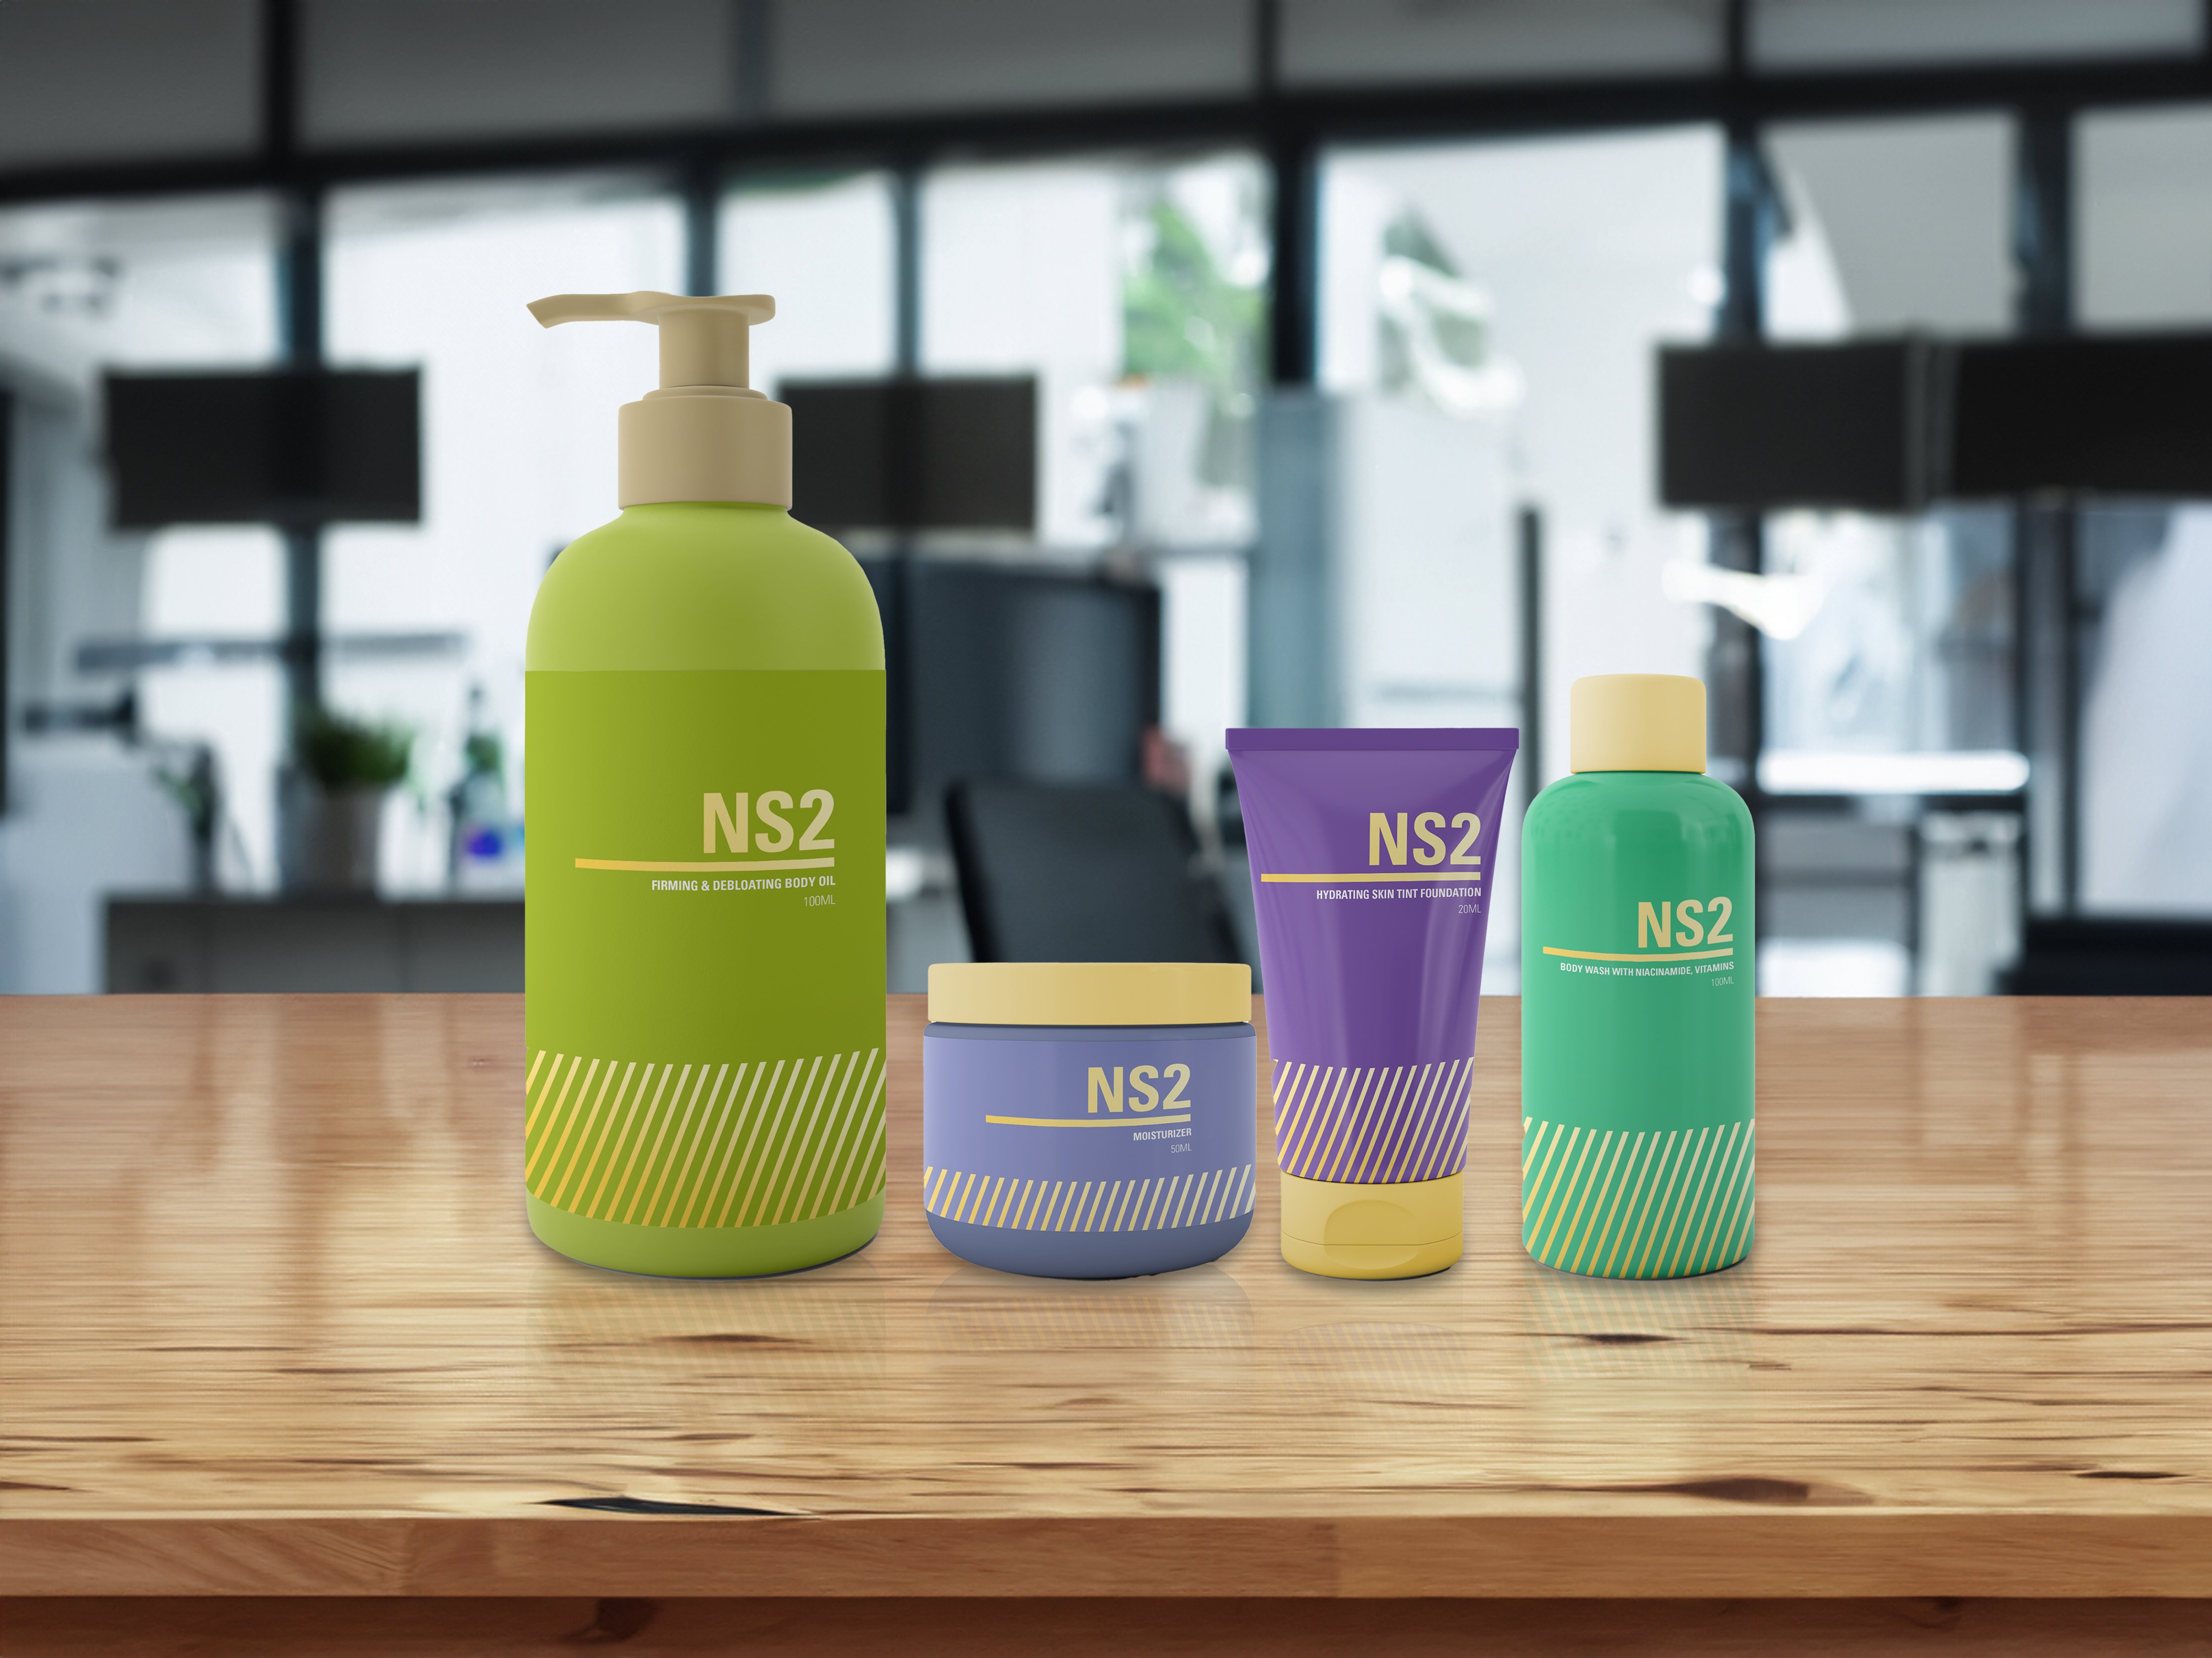
Then, we can use the photo you take of your products as a reference for resizing all of your products.


TIP

If you don’t have access to some or any products, you can use container volume to estimate the height.


Step 2: Remove background from product images


TIP

Before starting this process, make sure your product images are at least 2000px tall. This way when making visuals for even the largest canvasses, your products won’t lose resolution.


Remove backgrounds and trim transparent pixels of product images
  • Method 1 (fast & easy): one click background removal on dipp's platform
    • Open Brand settings > Image assets > Product photos > Your Desired folder
    • From the flyout menu under the '+' icon, click on Upload assets
    • Drag & drop product images in the area provided
    • Click on each asset to preview it and remove background by clicking Remove background


  • Method 2 (slower & harder): Photoshop's object detection to select objects 
    • Layer > New > New Layer via Cut
    • Delete background
    • ⌘/Ctrl+Click on the layer thumbnail to select layer boundaries
    • Select the Crop tool and hit enter to crop
    • Save as a PNG

Step 3: Scale products proportionally

  • Download and open this template in Photoshop
  • Replace “Layer” with the picture of your products
    • Extend canvas as needed
  • Drag & drop product images on the template
    • Import as smart objects to minimize resolution loss
  • Resize each product to match the reference photo
  • Export ‘layers to files’
    • Make sure the ‘Trim Layers’ check mark is on, this way the transparent pixels will be cropped off


Similar posts

Get notified on new marketing insights

Be the first to know about new B2B SaaS Marketing insights to build or refine your marketing function with the tools and knowledge of today’s industry.